
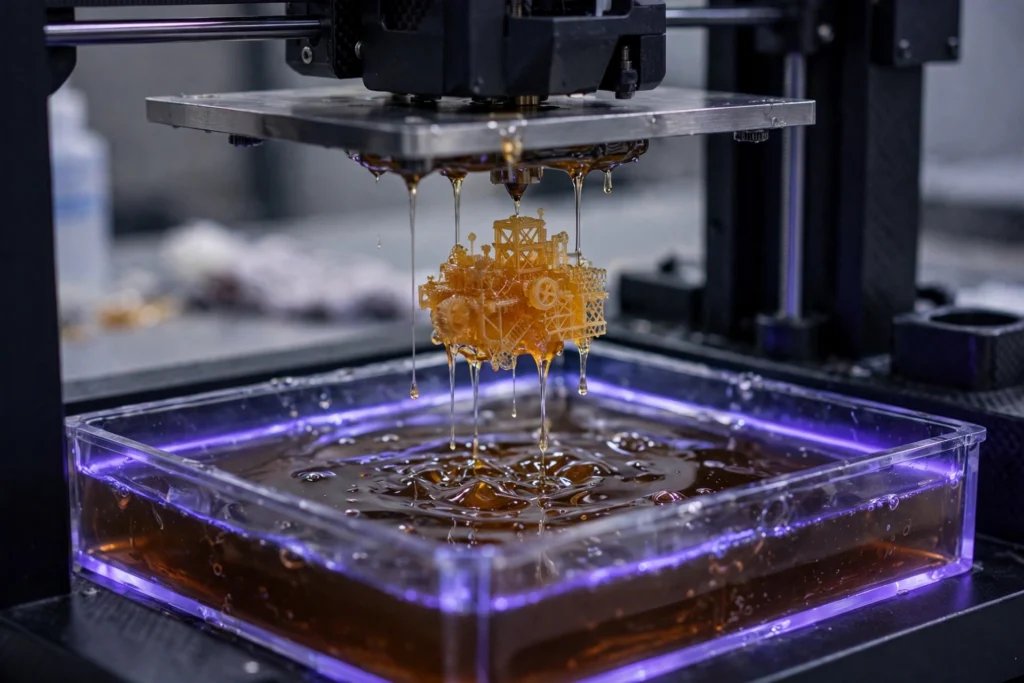
SLA 3D printing is the resin-based way to turn a digital design into a smooth, highly detailed plastic part without molds or tooling. It is one of the core methods behind rapid prototyping, because a team can go from a CAD file to a part it can hold, fit, and test in hours, with a surface finish close to injection molding.
This guide explains what SLA is, how it works, which resins it runs, what accuracy to expect, and how it compares with FDM, DLP, and SLS. It also covers design tips to judge whether SLA suits your part.
What Is SLA 3D Printing? #
SLA stands for stereolithography. It is an additive manufacturing process in which a light source cures liquid photopolymer resin into hardened plastic, layer by layer. The resin sits in a vat, and each layer is traced or projected onto its surface.
Under the ISO/ASTM 52900 standard, SLA belongs to the vat photopolymerization category, and it is also called resin 3D printing. The idea dates to the early 1980s: Japanese researcher Hideo Kodama described a layered approach using ultraviolet light, and Charles Hull patented the method in 1986 and founded 3D Systems (Formlabs).
How SLA Works, Step by Step #
Every SLA build follows the same sequence, from digital model to finished part. The printer software prepares the model, the machine cures it layer by layer in the resin vat, and the part is then washed, cured, and cleaned up before use.
- Model: Design the part in CAD and export it as a mesh file, usually STL or OBJ.
- Slice: Software cuts the model into thin horizontal layers and plans the orientation and supports.
- Print: A laser traces each layer, or a projector cures a whole layer at once, while the build platform lifts between layers.
- Wash: Rinse the part in isopropyl alcohol to remove uncured resin from its surface.
- Cure: Post-cure the part under UV light, sometimes with heat, to reach full strength.
- Finish: Remove supports, sand the marks, and the part may be painted, coated, or plated.
Common SLA Resins #
SLA runs on liquid photopolymer resin, and the resin choice drives strength, heat resistance, clarity, and cost. The six families below cover most everyday SLA work, with new formulations added for dental, medical, and engineering uses (Formlabs).
| Resin family | What it is like | Best for |
|---|---|---|
| Standard (general purpose) | Rigid, matte gray or colored; the workhorse | Design review models, fit checks, general prototypes |
| Clear | Highly transparent, polishable to near-optical clarity | See-through models, lenses, fluid-flow parts, molds |
| Tough | ABS-like; bends and absorbs impacts | Functional prototypes, housings, snap fits |
| Castable | Burns out cleanly with little ash | Jewelry and dental patterns for investment casting |
| High-temperature | Holds shape and stiffness at elevated temperatures | Molds, tooling, parts near heat sources |
| Flexible | Soft, rubber-like; bends and stretches | Seals, gaskets, grips, wearable parts |
Resin properties vary widely by brand and formulation, so the table above is a guide, not a datasheet. Standard, clear, and tough resins mimic familiar plastics, but they are not the same materials, and exact values come from the resin maker’s datasheet (Formlabs).
Standard (General Purpose) #
Standard resins are the default choice for most SLA prints. They are rigid, hold fine detail, and print reliably, which makes them the workhorse for design review models, concept parts, and fit checks. Formlabs describes them as formulated for speed and consistency.
Clear #
Clear resin creates highly transparent and colorless parts that can be polished to near optical transparency (Formlabs). That clarity suits lenses, light pipes, fluid-flow models, and two-part molds, where seeing inside the part helps. Like all resins, clear parts yellow slowly with long UV exposure.
Tough #
Tough resins mimic ABS-like plastics: they bend before they break and absorb impacts that would crack a standard resin. That makes them the pick for functional prototypes, housings, snap fits, and parts that must survive handling and testing.
Castable #
Castable resins are made for investment casting: they burn out cleanly with little ash, leaving a clean mold cavity. Jewelers and dental labs print patterns in castable resin, then cast them in metal like a wax pattern.
High-Temperature #
High-temperature resins hold their shape and stiffness where standard resins would soften, which suits molds, tooling inserts, and parts that sit near heat sources. They are more brittle than tough resins, so they fit static, heat-exposed parts better than impact-loaded ones.
Flexible #
Flexible resins behave like rubber: they bend, stretch, and spring back, which suits seals, gaskets, grips, and wearable parts. They print more slowly than rigid resins, and thin features can tear during support removal, so handle them gently after the wash.
Strengths and Limits #
Strengths #
SLA leads plastic 3D printing methods for detail and finish. Formlabs calls it the process with the fastest speed, highest resolution and accuracy, sharpest details, and smoothest surface finishes of all 3D printing technologies. Small features and curved surfaces come out clean, and parts look close to injection-molded goods with little post-processing.
Limits #
SLA resins are thermosets, not thermoplastics, so cured parts are more brittle than FDM or SLS parts and soften in heat. Resin is messy to handle, needs washing and curing, and uncured resin is a skin irritant, so gloves and ventilation matter. Build volumes are smaller than FDM or SLS, and resin costs more per part than filament or powder.
Isotropy and Watertightness #
Unlike FDM, SLA parts are highly isotropic: during printing the resin stays in a semi-reacted state, so layers form bonds across each other, and the finished part has near-identical properties in every direction (Formlabs). SLA parts are also continuous and watertight, which suits fluid-flow parts, enclosures, and molds.
Tolerances and Surface Finish #
Xometry lists SLA tolerances at about ±0.5 percent with a lower limit of ±0.2 mm, a layer thickness near 0.02 mm, and a minimum feature size of 0.1 mm. Features with angles below 45 degrees need supports, and unsupported spans can warp. These are planning values, not guarantees: material, part size, and geometry all shift real results.
Surface finish is where SLA earns its reputation. Formlabs calls SLA parts the gold standard for smooth finishes: layer lines are barely visible even on curves, and parts can look like injection-molded goods with little post-processing. For comparison, FDM parts show visible layer lines and SLS parts have a grainy, slightly rough texture. Formlabs reports its Precision Model Resin prints with over 99 percent of the surface within 100 microns of the digital model.
Applications of SLA 3D Printing #
SLA is used wherever fine detail and smooth surfaces matter. Design teams print concept models and fit-check prototypes, dentists print crowns and surgical guides, jewelers print castable patterns, and audiologists print custom ear molds (Formlabs).
SLA also serves manufacturing directly. Smooth, accurate resin parts work as molds for low-volume casting, as jigs and fixtures on the factory floor, and as end-use parts where the run is too small for injection molding tooling. Watertight resin parts even serve as fluid-flow prototypes and enclosures (Formlabs).
SLA vs FDM vs DLP vs SLS #
SLA, FDM, DLP, and SLS all build parts layer by layer, but they use different materials and suit different jobs. SLA cures liquid resin with UV light, FDM melts filament, DLP and MSLA project light onto a whole layer at once, and SLS fuses nylon powder with a laser. The table below sums up the differences.
| Method | How it works | Typical tolerance* | Best for |
|---|---|---|---|
| SLA | UV-cured liquid resin | ±0.5% (±0.2 mm) | Fine detail, smooth surfaces |
| FDM | Melted filament, layer by layer | ±0.5% (±0.5 mm) desktop | Strong, large, low-cost parts |
| DLP / MSLA | Projected light cures a whole layer | About the same as SLA | Fast builds of small, detailed parts |
| SLS | Laser-fused nylon powder | ±0.3% (±0.3 mm) | Strong parts, no supports needed |
*Tolerance figures are Xometry’s published indicative values and vary with material, size, and geometry. For detail on the other methods, see our guides to FDM 3D printing and SLS 3D printing. If your part needs tight tolerances, smooth surfaces, or production materials, CNC machining services may be the better route, since machined parts hold far tighter tolerances than printed ones.
DLP and MSLA: Same Family, Different Light #
DLP and MSLA belong to the same resin family as SLA, but they cure a whole layer in one exposure instead of tracing it with a laser. That makes them faster per layer, especially for builds with many small parts on one platform (Formlabs). For the full side-by-side comparison, see our SLA vs DLP guide, which covers speed, resolution, cost, and build size.
Design Tips for SLA Parts #
Good SLA design works with the resin process instead of against it. Small choices at the design stage decide whether a part prints cleanly, holds its fit, and survives washing and curing.
- Orient for supports: Angle flat faces so supports land on hidden surfaces, since each one leaves a mark to sand.
- Hollow large parts: Hollow thick sections and add drain holes, so uncured resin can escape and the part cures evenly.
- Mind thin walls: Features near the 0.1 mm minimum may not resolve cleanly, so keep structural walls and text well above that size.
- Allow fit clearance: Leave extra clearance on mating features, because resin shrinks slightly during curing and finishing changes dimensions.
- Drain and dry fully: Let parts drain and dry completely before post-curing, or trapped resin will harden in the wrong places.
Frequently Asked Questions #
What is SLA 3D printing? #
SLA 3D printing is an additive manufacturing process in which a light source cures liquid photopolymer resin into hardened plastic, layer by layer. It is also called stereolithography or resin 3D printing, and it is known for fine detail and smooth surface finishes.
What does SLA stand for in 3D printing? #
SLA stands for stereolithography. The name describes the process: stereo means solid or three-dimensional, and lithography means writing with light, as the light source writes each layer into liquid resin.
How does SLA 3D printing work? #
A CAD model is sliced into thin layers, and a light source cures liquid resin one layer at a time in a vat. The part is then washed in alcohol to remove uncured resin, post-cured under UV light to reach full strength, and supports are removed and sanded.
How long does SLA printing take? #
Most small SLA builds finish in under two hours on a modern desktop printer, according to Formlabs, and larger builds can take most of a day. Print time depends on part height, layer thickness, and resin, not on platform fill.
Which is better, SLA or FDM? #
It depends on the part. SLA gives finer detail and smoother surfaces, so it suits small, cosmetic, or highly detailed parts. FDM gives stronger, larger, and usually cheaper parts in engineering thermoplastics. For functional prototypes and parts that must take load, FDM is usually the better choice.


